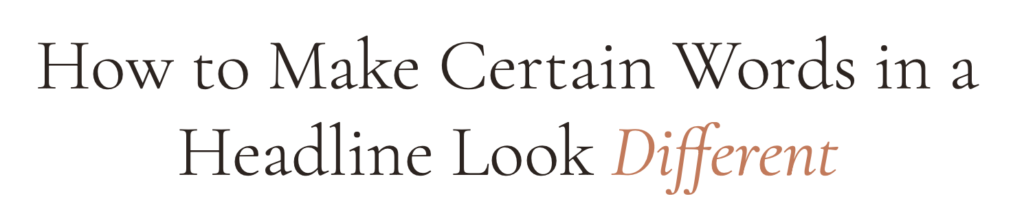
You have probably spotted it on beautifully designed websites: a headline where one or two words are in italics, a different colour, or even a completely different font. It looks like magic, but it is actually one of the simplest CSS tricks you can learn.
The secret is a <span> tag with a class.
A <span> is an invisible wrapper you place around any word (or words) inside your HTML. On its own it does nothing. Once you give it a CSS class, you can style those specific words however you like, while the rest of the headline stays untouched.
The Basic Technique
Step 1: Wrap the word in a span
In your HTML, surround the word you want to style with an opening and closing span tag. Give it a class name of your choosing.
<h1>This is where <span class="highlight">cake</span> meets modern art</h1>
Step 2: Write a CSS rule for that class
In your stylesheet, write a rule using the class name you chose. Only the wrapped word will receive these styles.
.highlight {
  color: #C27A5B;
  font-style: italic;
}
That is it. Only the word “cake” gets the colour and italic treatment. Everything else in the heading is unaffected.
What can you change?
Inside your CSS rule you can mix and match properties. Use color for a different hue, font-style: italic for italics, font-weight: 700 for bold, or even font-family to switch to a completely different typeface for just those words.
Naming tip for classes: Call your class something descriptive, such as .highlight, .accent-word, or .fancy. No spaces, and always start the CSS rule with a full stop. The name in the <span class="..."> must exactly match the name in your CSS, including capitalisation.
How to Do This in WordPress
The exact same technique works in most WordPress themes, such as WordPress Elementor. You just need to know where to add the span and where to put your CSS. Here is how to do it step by step.
Step 1: Add your span tag in the text or headline widget
In Elementor, add a Text Editor or Heading widget to your page. The key is switching from the Visual editor to the HTML view; this is where you add your span tag directly.
Look for the Text tab at the top of the content editor in the left-hand panel and click it. You will now see the raw HTML. Wrap the word you want to style like this:
This is where <span class="highlight">cake</span> meets modern art
Switch back to the Visual view and the text will look normal for now. The styling comes in the next step.
Step 2: Where to add your CSS to change individual words in your headline
- Go to Appearance → Customize → Additional CSS in your WordPress dashboard.
- Add your CSS using the class name directly:
.highlight {
  color: #C27A5B;
  font-style: italic;
}
Alternatively, install the free Simple Custom CSS and JS plugin from the WordPress plugin directory. It gives you a dedicated editor at CSS & JS → Add Custom CSS and works the same way. If you use a modern WordPress theme, such as Divi, Astra, Elementor, you don’t need the extra plugin!!
Step 3: Apply it consistently across your site
If you want the same styled word effect used throughout your whole website, the best place to put your CSS is Appearance → Customize → Additional CSS (or Elementor Pro’s Site Settings → Custom CSS panel). Define the class once there, then simply add the <span class="highlight"> in whichever widgets you like. The styling follows automatically everywhere.
Which options can I change?
The following table shows you all the different options. Grab your brand colours in Photoshop or an online colour picker and use Hex Codes (a hex code is a colour that’s described like this: #C27A5B).
Use the EM value for font sizes as this translates better on mobile devices. I.e. avoid using font-sizes in px values, but use something like this: font-size: 1.2em;
For more options, check out W3Schools. Describe in Google or ChatGPT what you want to change, for example use this: “Give me the CSS for changing the text colour.
| Style property | Options | Example: What to add { inside the curly brackets } |
|---|---|---|
| Colour | Any hex code, colour name, or RGB value | color: #C27A5B; |
| Font style | normal, italic | font-style: italic; |
| Font weight | 300 (light), 400 (normal), 700 (bold) | font-weight: 700; |
| Font size | Any value in px, em, or rem | font-size: 1.2em; |
| Font family | Any font loaded on your site | font-family: 'Playfair Display', serif; |
| Text decoration | none, underline, line-through | text-decoration: underline; |
| Letter spacing | Any value in px or em | letter-spacing: 0.1em; |
| Text transform | none, uppercase, lowercase, capitalize | text-transform: uppercase; |
| Background colour | Any hex code, colour name, or RGB value | background-color: #FAF0E6; |
A Summary of Your Options
To recap, here is what you need at a glance:
- Wrap the words you want to style in
<span class="your-class-name">...</span>inside your HTML or Elementor widget. - Write a CSS rule using that class name to define the colour, style, weight, or font you want.
- Add the CSS via Dashboard → Appearance → Customize → Additional CSS.
That is all there is to it. Once you have written the class once, applying the effect to any headline on your site takes only a few seconds.